Showing posts with label DIY. Show all posts

Monday, July 13, 2015

0 the olive guide : summer edition


I had the privilege of contributing to The Olive Guide, a new quarterly online magazine! This magazine is the vision of my friend Quintel and it's full of bright, fun inspiration not just for your interiors but for your whole summer.

Can you believe that the chandelier on the cover is a DIY project? Interior Designer Saudah Saleem tells you exactly how to make your own inside this issue.


If you follow me on Instagram, you may have seen me post my favorite photo from the issue, designed by Astral Ricks. I absolutely love the dark walls and bright artwork she used in this warm bedroom makeover.


There is so much more goodness inside this issue to see so please, check it out HERE!

Thursday, August 9, 2012

0 11 ways to make your space bigger

I love this little infographic about how to trick your space into appearing larger. I would give these tips to any client!
ways to make your space bigger

Tuesday, July 17, 2012

4 when diy goes bad.... then good


diy tufted headboard
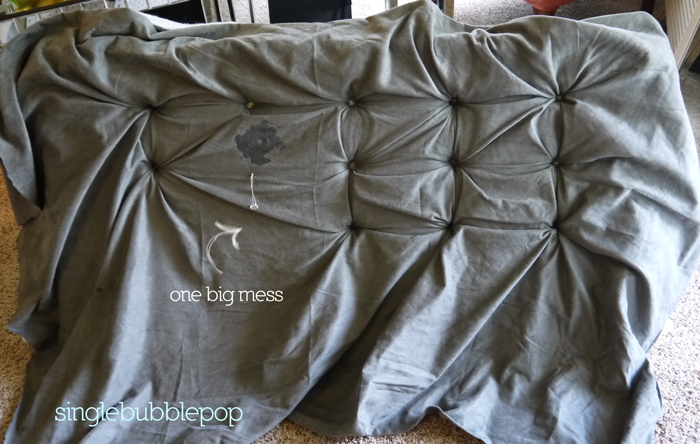
Remember a while back when I posted this preview image of a DIY project I was working on? And I promised to show you the results... well! It didn't quite turn out how I wanted. Let's just say, pretty much everything that could go wrong with this tufted headboard project did. Chalk it up to completely poor execution. I got so frustrated that I actually gave up, and this big ol' mess was sitting on my floor for months. Just terrible!


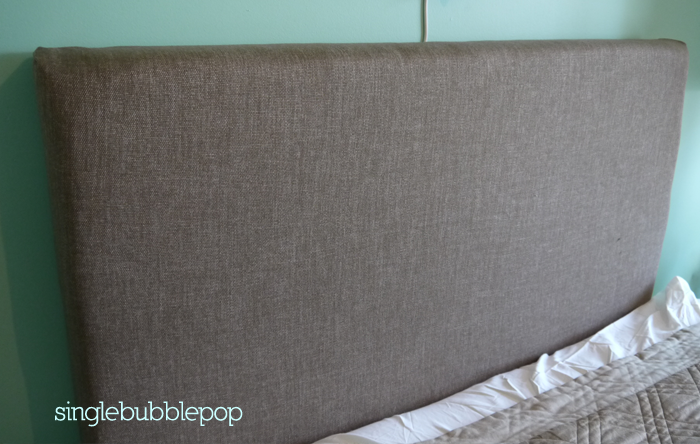
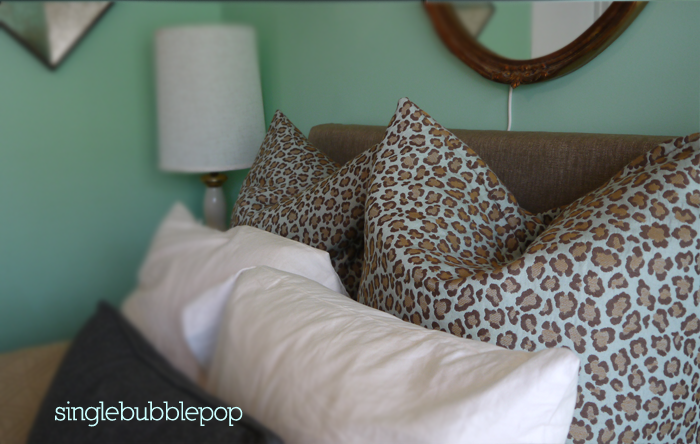
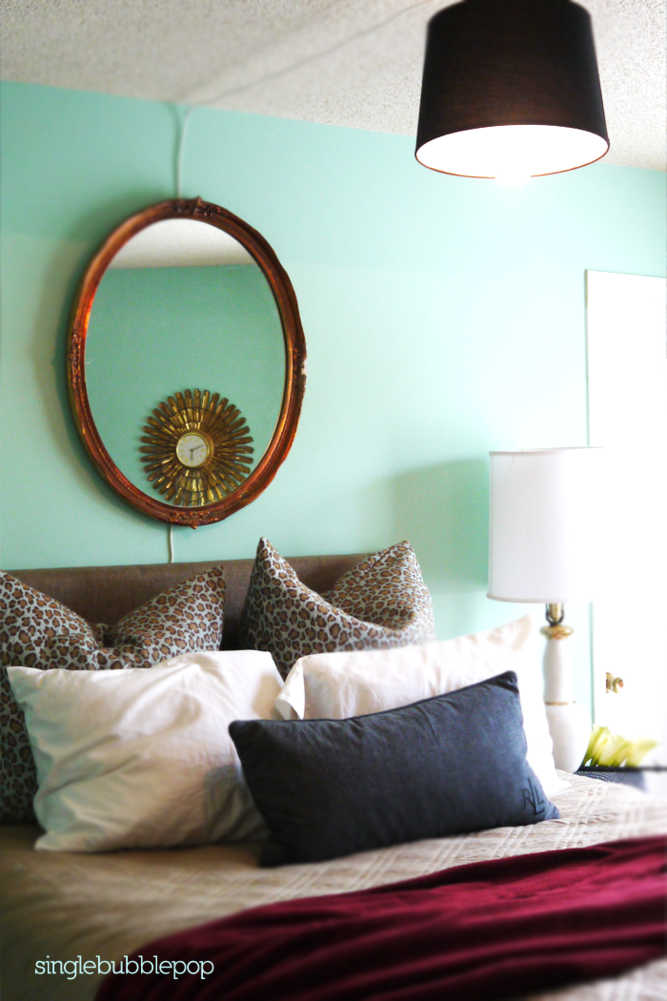
Last Saturday I decided that enough was enough and I HAD to do something about this. A) I wanted to finally have a headboard & B) I was sick of it taking up my very limited floor space. The solution: Take the tufts out and the fabric off and do a simple box headboard instead. I had some beautiful fabric left over from these custom pillows I made and it coordinated perfectly with my cheetah print euro shams.
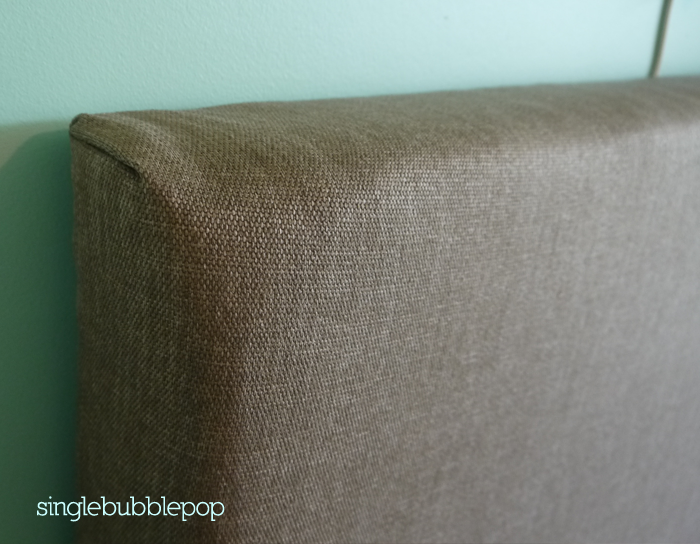
diy upholstered headboard corner
Here is a closeup of the fabric and my beautifully tapered corners that I'm oh-so-proud of. Ha! I plan to do a faux nailhead trim around the perimeter using thumbtacks, but until that happens, I'm loving it thus far!


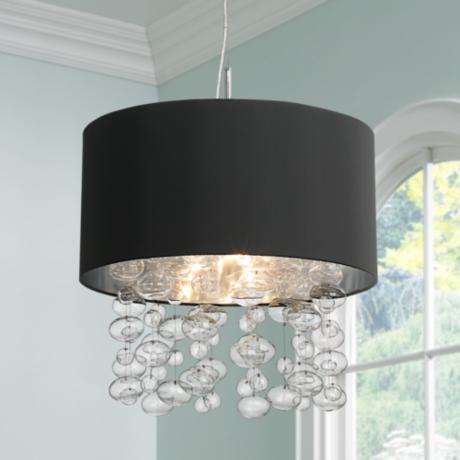
That lampshade on the ceiling is my next project! This is where I'm taking it....


Stay tuned!!

Thursday, December 22, 2011

0 tips for your Christmas table decor

I'm so excited to actually be able to spend Christmas day with my family this year & have some great food! My dream would be to host them all at my place, with a beautifully decorated table large enough to fit all of us. I found these great examples of elegant & fun Christmas tables on Pinterest and thought I'd give you some tips on how to recreate the looks!


TIP #1 Pull furniture from other rooms to create more seating! Everybody knows that when you're hosting dinner unexpected guests show up. Be prepared & at the same time create a beautiful layered look by using ottomans & chairs from other rooms.


TIP #2 Use what you have! No table cloth? That's ok! Use whatever fabric you have to create a table runner & embellish it with a holiday ornament or berry twigs as seen here.


TIP #3 Repetition makes perfect! It's not always about the grandest decorations. Sometimes using a simple classic piece multiple times can create a greater look!


TIP #4 Bring some nature in! Snip some branches off your live tree & use a sliced tree branch to add a fresh look AND aroma to your table.


TIP #5 Choose one color! It's really hard to make multi color holiday decor look chic. If you choose one color, be it red, green, purple or even gold, it looks 10 times more modern.


TIP #6 And lastly, choose a theme! In the case above, the theme was circles. You can do stars, trees, wreaths, anything! As long as they are all similar in shape & color, it will look awesome!


Hope these tips help! I'd love to see photos of your holiday decor. Send them to me via Twitter or post them on the SBP Facebook page!


Wednesday, December 7, 2011

7 design talk webisode 2: top ten tips for renters!


I'm so excited to show you another webisode of Design Talk!!! Tricea and I came up with our Top Ten ideas for warming up a rental space after Ishea gave me the great topic idea on Twitter! We had so much fun and I hope you love it. We love your comments and please do share the video with someone you know! :)


Wednesday, July 27, 2011

0 rue issue 6

The Rue team once again delivered an awesome issue packed full of decor, fashion and travel inspiration. Here are a few of my favorite "tears" from this issue.

rue issue 6 august summer
The cover is stunning! It's so vintage glam...

rue issue 6 august summer
I loved these picks from guest curator David Bromstad - his pieces are numbers 2,3 & 7! By the way, have you seen the new season of Color Splash? Crazy good!

rue issue 6 august summer
This layout was such a creative way to display a DIY project for a "staycation" party.

rue issue 6 august summer
A close look at the Arabian nights cover story shows more of the glamorous setting they created in this desert scene.

rue issue 6 august summer
My favorite room in the whole issue because that headboard is SICK & paired with a canopy? Love it!

rue issue 6 august summer
And last but not least... Bless whoever made the decision to include this little bit of eye candy. :)

If you haven't checked out the latest issue, what are you waiting on? Click here. If you have, tell me what you loved most!

Wednesday, March 23, 2011

6 rue issue 4


Whoa! This issue of Rue Magazine is all over the place, and I love it! They have features from Manhattan to the desert. The design styles range from tradionial with a twist and eco-friendly DIY projects. There's something for everybody.

Here are some of my favorite pages:


I love this color pallete - and I'm dying for one of those mint green Eames chairs!


I loved this page for obvious reasons, and the interviews were cute too! ;)


The simply styling here paired with that DIY wallpaper is really beautiful. Graham & Brown has a similar style for less that $50 a roll!


This huge photo collage frame jumped out at me! I love the idea of taking something common and making it special by increasing it's size.


Closet heaven!!


And lastly, I loved this primarily traditional dining room with a little bang! in the background.


If I copied all of the pages I loved, I'd be stealing the entire magazine. Go check out the rest! www.ruemag.com

Sunday, February 20, 2011

8 easy no-sew tableskirt

Usually, the art of interior design requires a mix of an eye for style, creativity, research and strategic planning. In this case, I can tell you that I used no planning whatsoever to do this project! I decided to revamp my home office this weekend, but I had no idea what I was going to do until I did it.

I had my desk and computer set up in the closet of my guest bedroom. My reasoning for that? I hate seeing all the paperwork, chords and such associated with work and having my desk in the closet allowed me to just close the doors and see none of it. The problem with that? My back was always turned from the window, and the heat from my BIG iMac in that tiny closet would make it very warm in that tiny space.

When it was in the closet, I had some fabric that I found for a bank-breaking $3.56 at Goodwill hanging on the inside walls of the closet as "curtains". It was cute but, didn't really have an impact on the room. After taking these pseudo curtains down, a stroke of inspiration made me realize that I'd cut them the perfect width to be a skirt for my desk! Instantly, I pulled out my scissors, tape and glue gun and went to work.

easy diy no sew table skirt IKEA goodwill hot glue gun
What I am using as a desk is actually an IKEA table. First I wrapped the perimeter of the table in one half of the striped fabric and taped it to the top of the table to make sure there was a snug fit. I didn't need to cut anything! It was already the perfect size. :)

easy diy no sew table skirt IKEA goodwill hot glue gun
Once that was done I laid the second piece on top of the table and trim it to about 1" + the tabletop size. Then I gently folded the fabric along the front side of the table at the black stripe to keep the pattern. I put a little hot glue every inch or so right in between the two pieces.

easy diy no sew table skirt IKEA goodwill hot glue gun
Once the first side was done, I let the glue dry before starting on the others so that I could pull the fabric taut as I went. I simply wrapped the corners like a present and *TADA* brand new desk :)

easy diy no sew table skirt IKEA goodwill hot glue gun


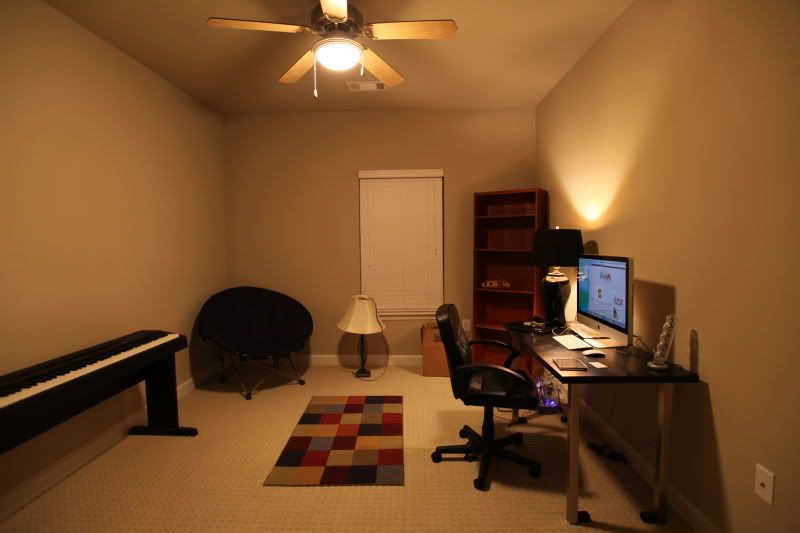
Here's what my guest room/office looked like when we first moved in...
easy diy no sew table skirt IKEA goodwill hot glue gun office desk

Here it is now! Not nearly done but here's a first look. The two bookcases are the perfect size to fill that wall, and also from IKEA. The lamp is one of my favorite finds from one of my fave Raleigh vintage stores. The small piece of art on my desk was a gift from Blayne for my birthday last year, I love it! And the roses are left over from Valentine's Day!


click for a bigger view

I'll be sure to post the finished room soon. I'm on a mission to finish it now! What DIY projects have you done lately?

Monday, June 28, 2010

0 rachel's living room makeover

Rachel Stewart, a talented artist & jewelry maker, recently made over her living room and did an awesome job! I love what she did with the lighting and the color throughout the room.


:::BEFORE:::


The room looked great before the makeover, but every once in a while we all want a little change! Rachel did a great job of using the main elements in her room (furniture, rug, and key accessories...) and creating a totally different look.

:::AFTER:::

These lamps really create a lounge like feel in the room and the graphic pillows pop off her sofa, unlike the solid colored ones she had before.


Rachel's mix of African inspired accessories with modern graphic pattern really speaks to her love of both! I happen to know from reading her blog that she's a huge comic book fan and hip-hop junkie - and these kinds of prints fit her two passions perfectly! When decorating, don't be afraid to include what YOU like, even if it doesn't "go" with you home. If you would wear it on your body, you shouldn't feel like it doesn't belong in your living room.


Lastly, Rachel created an beautiful original piece of art to complement her new room. Although Rachel is a professional, I encourage anybody to try creating something original for your space while decorating. It doesn't get more YOU than something made with your own hands.


Thanks to Rachel for letting me share her space on SBP. If you have a space that you've made over, I'd love to feature it here! Email me at hello(at)nikimcneill.com. And if you have a space you want to make over but are lost about where to start, I'd be happy to offer my design services through SingleBubblePop Design Studio!

Related Posts with Thumbnails